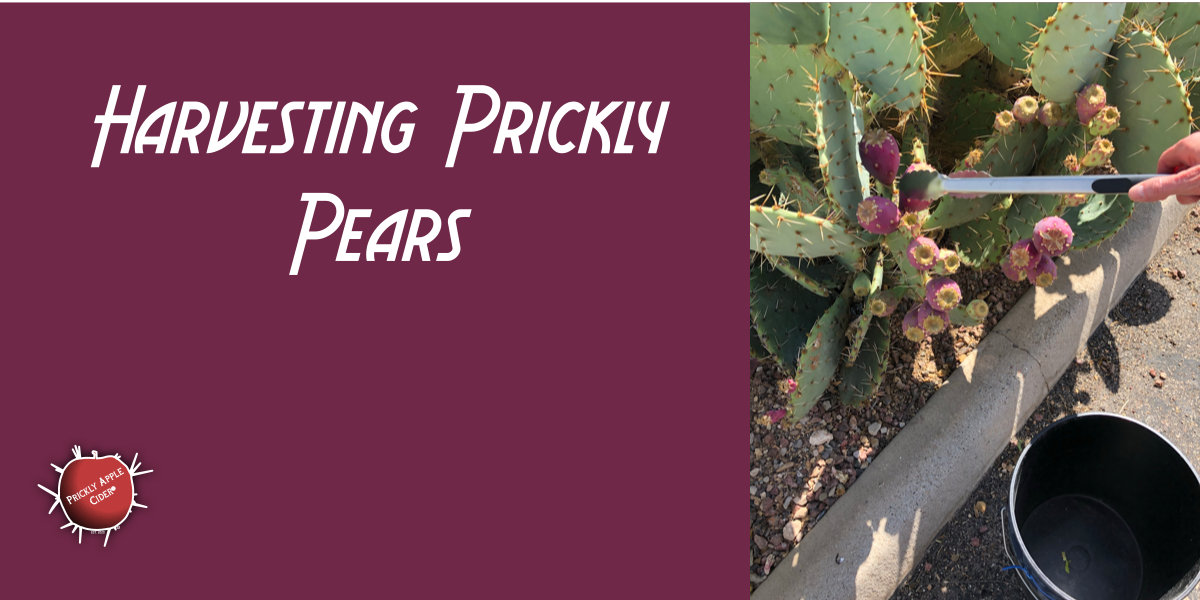
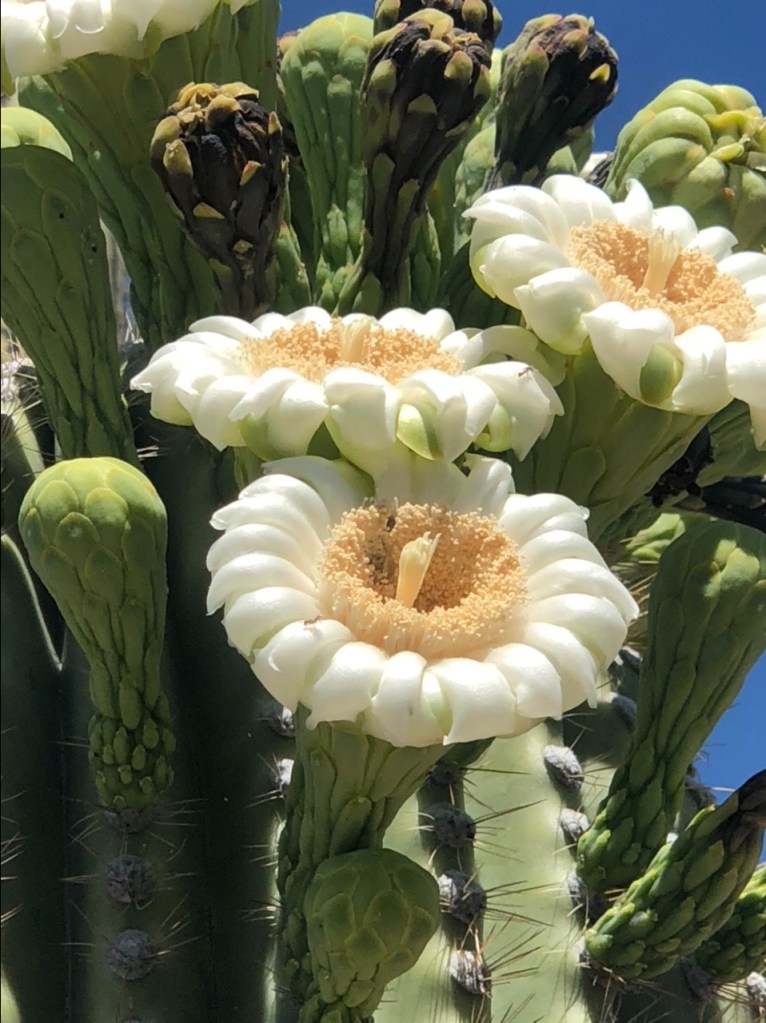
In my book, The Art & Science of Cider, I advocate for making hard cider that represents where you live. Almost every place in the world does or can grow apple trees. However, they also grow many other great fruits, flowers, herbs, and vegetables. Hard Cider is the perfect method to include and highlight these local adjuncts. I live in southern Arizona and one local fruit that you can find is from the cacti in the area. Just look at our state flower. It is the saguaro bloom. I could use the fruit from the saguaro n my front yard but then I’d have to fight the neighborhood birds for the right to harvest them. Plus, not everyone has saguaro fruit in their front yard. However, another type of cactus that is found in a lot more locations is the prickly pear. Their fuchsia pink juice make a great adjunct for hard cider. You can find my Prickly Apple Cider recipe by clicking on the link or going to the recipe section of my website. However, harvesting them is definitely more challenging than picking apples so I wanted to share what I have learned to help you avoid some of the potential pitfalls.


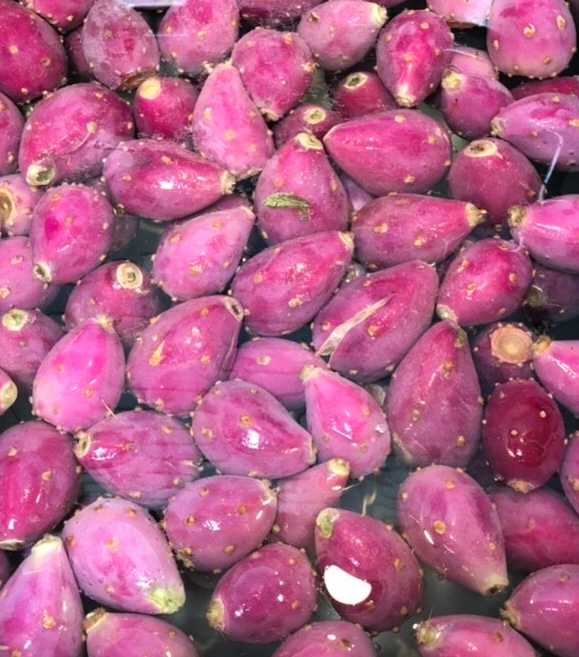
There are many types of prickly pears and the fruit they produce vary in color, size, and taste. I tend to pick a variety that are large in size with a medium pink color. You can see in the following photo the size and color variation of some that I recently picked. Besides the color and size, the flavors can also vary. However, the one thing that doesn’t vary are the stickers or spines that are found on the pads and the fruits. They don’t call them prickly without a reason.

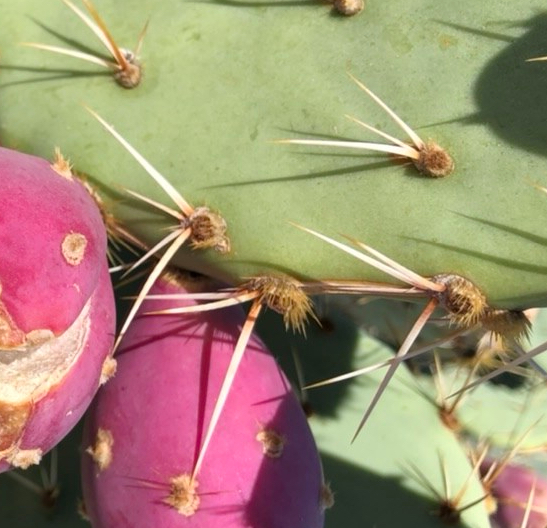
Most people see the prickly pear plant and are immediately concerned about the large spines sticking out from the pads and even the fruit as it grows. However, these aren’t the real dangers. The danger comes from the the fine or hairlike spines that aren’t obvious. You can see them in the below pictures. They are around the base of the large spines and floating on the surface of the water as the fruit is washed. These make three tools essential to the harvesting and processing of prickly pear fruits.

Harvesting and Processing Tools:
- Bucket or Tub: Prickly pear fruit is not something you want to carry around in your hands or shirt. These are not blueberries or raspberries. Even if you’re wearing gloves, you don’t want to handle them if you can avoid it.
- Tongs: The longer the tongs, the better they are. Also, don’t use rubber ended tongs or you will end up with a bunch of hairlike spines in them. Tongs allow you to reach in, grab the fruit, twist it off to remove it, and place it in the bucket.
- Chemical Resistant Gloves: Don’t wear leather gloves. There aren’t any leather gloves that are thick enough. The spines will Stick into the gloves and work into your hands for years to come. The only gloves that I have found to resist the spines are heavy-duty chemical resistant gloves, the heaviest you can find. The type where you can’t really bend your fingers When you wear them. The hairlike spines can even stick in them if you aren’t careful. You think I’m making this up, but I’m not. I have become an expert at removing these spines, but I don’t enjoy it. I use these gloves to wash the fruit and to load it into my juicer.

Tub or Bucket

Tongs
Chemical Resistant Gloves
Juicing:
What is the best way to extract the juice from prickly pear fruit. Well, besides carefully, there are two methods I have used successfully. There are also some I don’t recommend, like using a masticating using and trying to juice the whole fruit. The seeds inside a prickly pear fruit are like rocks. I have never experienced a seed that is harder. This makes them impossible to run through a masticating juicer as I learned one day to the detriment of my juicer. I currently use a centrifugal system juicer. I drop the whole fruit into the wide mouth chute and it kicks and seeds and pulp out and the juice is gathered. This works well because the seeds can easily pass into the waste chute. The other way is a food processor or blender and a stainless sieve. Drop the whole fruits into the blender, blend them relatively smooth and then strain it through the sieve. Having something that you can use to press on the pulp in the strainer can help, But, you will end up with less juice using this method. There may be other methods, but these are the two that have worked for me in the past.

You may be wondering how much fruit should you harvest. I find that I can get one gallon (3.8 liters) with 13-15 pounds of ripe fruit using my juicer. This is similar to the yield I get with my apples. The next question is usually, how do you know when it’s ripe. If you know the fruit from previous years, color will give you some indication but the better two methods that I find are the the lack of large spines on the fruit and that flatness of the fruit top.
Below in the first photo, you see how a newly forming fruit still has the long spines on it while the riper fruit no longer has these. Losing the big spines indicates a fruit is getting ripe. In the second photo, you see example of the tops of the fruits. The middle fruit is almost completely flat and the top is actually splitting. The bottom fruit is has no large spines but the top is more sunken. The top fruit is a little more sunken then the middle fruit, but is also starting to show cracks. For some plants, the fruits never get a completely flat top while others become so flat and big, they split apart. In my area, you will usually see fruit ripen throughout the month of August but as early as late July.

Prickly Pear Fruit: Ripeness 
Prickly Pear Fruit Ripeness: Flat Top
Fermenting:
You can add this juice directly to you primary or as a secondary. The sugar level it not as high as apple juice. What I recommend is freeze concentrating it just like I would an ice cider. Add it to plastic containers and freeze it. Then do a freeze and thaw process several times. After 3-4 cycles, I start thawing and draining the concentrated juice. Normally, I reduce my volume in half. This will almost double the sugar to 1.045-1.052 but also the acid, color, and other compounds found in the juice. I then add this to my cider after primary is complete, ensuring a good amount of headspace to let this ferment out. Using concentrated juice and processing it as a secondary generally retains more color and the higher sugar doesn’t dilute the cider.
Did you enjoy this article? Don’t miss future posts from PricklyCider.com by following us today! PricklyCider.com is your source for all things cider.
It’s that easy. No, I won’t sell your email or blitz you with a bunch of requests to buy things. You will simply get a link to my articles and an easy method to communicate with me if you have questions or need help with a batch of cider. Thanks for reading, stay safe, enjoy cider!