In part III of my developing your method post, I explore carbonation and how this can impact your method for making hard cider. The method I generally use, is force-carbonating. The most common method to force-carbonate is using a kegging system. Kegging systems can come in various sizes, but 5 pound CO2 tanks and 5 gallon ball lock kegs are pretty common for many home brewers or craft beverage makers like hard cider. In my book, I provide a lot of details including force carbonating tables and the equation used to create this table. You can also find force-carbonation tables online. As I have discussed in other posts, forced-carbonation is a matter of temperature and pressure. At atmospheric pressure (the open air) and ambient temperature (68F/20C), hard cider will naturally retain about 0.85 volumes CO2. That means, there is 0.85 liters of CO2 dissolved in every liter of hard cider.
To force-carbonate hard cider or any beverage, you generally want the liquid (hopefully some yummy home crafted hard cider) to be as cold as possible. Cold will reduce the pressure required to achieve higher carbonation levels. The other factor that influences force-carbonation is the surface contact area between the hard cider and the CO2 in the keg. A larger surface area helps the cider absorb the CO2. However, as I have learned, this can still take time. In my book, I wrote about hooking up my CO2 tank to my keg and placing them in the refrigerator together. I also tried another process where I set the pressure in a keg high and placed it in the refrigerator without being hooked up to the CO2 tank. I would come back the next day and add more CO2. The cider would keep absorbing this CO2. I have found a third method that I think works the best and it’s a combination of methods that I have tried. I call it the Cider Shake.
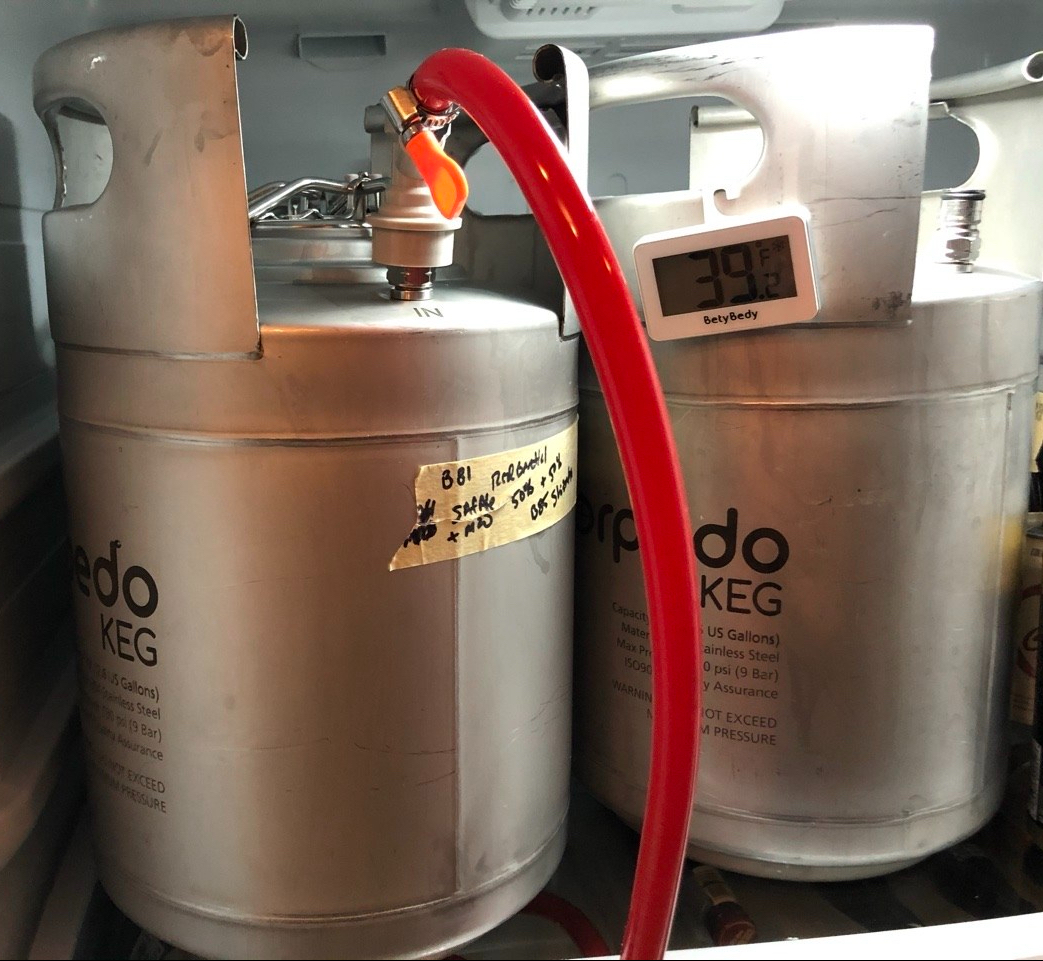
To explain this method, I created the following series of steps. I also provide a video of this process. Once you have fermented, aged, clarified, and put your hard cider in a keg for packaging, it’s time to force-carbonate. I admit, the smaller the keg, the easier it is to do the Cider Shake. Here are the steps to using the Cider Shake method.
Cider Shake Method
- After filing the keg, attach the CO2 line to the keg and purge the air by filling the keg with ~10 psi and opening the pressure-relief valve for a few seconds.
- Increase the pressure in the keg to 30-40 psi and remove the CO2 line. This is your initial priming pressure. Your hard cider will absorb this quickly as it cools.
- Place the keg in the refrigerator for 24 hours.
- After 24 hours, assess the temperature in the refrigerator and select the psi needed to achieve your desired volumes CO2. For example, to obtain 2.75 volumes CO2, a pressure of 14 psi is needed for a refrigerator that maintains 40F (~4C). You can find a complete table on the internet or in my book.
- Attach the CO2 line and increase the pressure to your target value. You should hear a squeak as the CO2 fills the keg. Headspace, surface area between the cider and the CO2, in your keg matters. If you filled your keg to the very top, it will be harder to force carbonate it.
- Do the Cider Shake. With the CO2 line attached, start shaking the keg. You will need to do this for several minutes so find a comfortable but effective way to agitate it. This is where smaller kegs are nicer. You should hear the CO2 squeaking as it continues to enter the keg and be forced into the cold cider.
- Once you don’t hear anymore squeaking, you can stop. I usually increase the pressure by 3-4 psi and unhook the CO2 before putting it back in the refrigerator to settle.
- After 24 hours, you should be ready to bottle. Check out my post and video on counter-pressure bottling in the tips section.
That is the best process I have found for force carbonating. You could reduce the overall time but I prefer to let the kegs rest 24 hours to ensure the cider is chilled down and the CO2 is absorbed into it. Also, if you have limited headspace, you might need to shake it multiple times or for a long period. If you have a 5 gallon keg with 5 gallons of hard cider in it and only 5 ounces of space for the CO2, you have a lot of shaking to do. 5 gallons is 640 ounces. Your hard cider normally has 0.85 volumes CO2 in it from fermenting. If you want 2.75, you need to add 1.9 volumes. That is 1,216 ounces of CO2 but the space you have to fill is 5 ounces so you have to fill that area 243 times as you are shaking it. In this situation, headspace is your friend if it’s filled with CO2.
Did you enjoy these tips on making hard cider? Check out my book to learn more ideas and information on making and enjoying hard cider. It will help you develop a process that matches your desire and equipment. It will also show you how to pair cider with food to maximize your experience. You can find it as an eBook and a 7×10 paperback on Amazon or a 7×10 paperback on Barnes & Noble. Click on these Links to check them out.


Have you ever tried a side by side comparison of force carbonating some of your cider and naturally condition some of the same cider? I been to some breweries that offer some of the beers on cask condition as well as the force carbonation and there is a difference between the two. The cask condition seems smoother or less harsher, though force carbonated beer wasn’t harsh by any means, its just when compared to the cask condition. I wonder if this would hold true with cider as well? I have bottled condition and kegged but never bottled using the bottle gun yet. I will have to try that sometime. Thanks for your article!
LikeLike
Thanks for reading and commenting! Once I moved to kegs, I started force carbonating because it kept the cider clearer so I don’t often condition cider these days. For reference, I tend to like higher carbonation and serving from a keg has always been challenging to keep the carbonation in the cider. I’d end up with foam and not much carbonation so I bottle mine. In addition, I have a limited number of kegs and I tend to do a large number of batches so I need to clear out my kegs for another batch. I have not run side-by-side comparisons on force carbonated versus conditioned ciders. What I have read is that supposedly the bubble are different sizes. I haven’t noticed that impact but it might be there. I have made some conditioned ciders and what I have noticed is the impact of autolysis. If you let the cider age on the conditioning lees, you will get autolysis (release of various compounds like mannoproteins) and are more likely to get MLF as well. Some of those compounds released in autolysis can impact mouthfeel and sweetness, which will make them smoother and less harsh and MLF a would decrease acid levels doing the same. You won’t get the autolysis with a cider that has been clarified and force carbonated and MLF will also be less likely. My guess is that this is some of the impact you are noticing.
LikeLike