This post is not so much a hard cider recipe as it is a simple and low cost method to making hard cider. It’s focused on providing a basic foundation for making hard cider my way. My way means organic and no sulfites. However, if that’s not your way, it can easily be adapted to using sulfites or using non-organic juice. Once you develop a method, the recipes I provide on my site become more meaningful. You will be able to use this method to make most of them, and once you establish a method, you can expand that as desired. My goal is to make the hard cider process less intimidating and guide someone who might not be able or just isn’t sure how much they want to invest in this new hobby. This is a slightly modified version from my book, The Art & Science of Cider, which you can purchase through Amazon. It is what I wish I’d have known before I made my first batch many years ago. If you’d like to grow and expand the method you use to make hard cider, the book will be a valuable asset. Plus, I think it’s interesting.
If you already have a method for making hard cider, this article might still be interesting. It may challenge some of your ideas. However, you may be able to just jump to my hard cider recipes and consider how you can adapt them to your method. Here is the link to my hard cider recipe page. Enjoy!
If you are still reading, it means you’re ready to learn a simple and low cost method for making hard cider. This is a method. It is not really a hard cider recipe. I go into great detail because I’m trying to answer all the questions I had back when I first started making cider. As I mentioned, I wrote this based on minimizing the investment you’d need to make in equipment while teaching you about the hard cider making process. You will also get a nice hard cider in the end. Hopefully, you find the process rewarding enough and the method easy enough to continue on your hard cider journey.
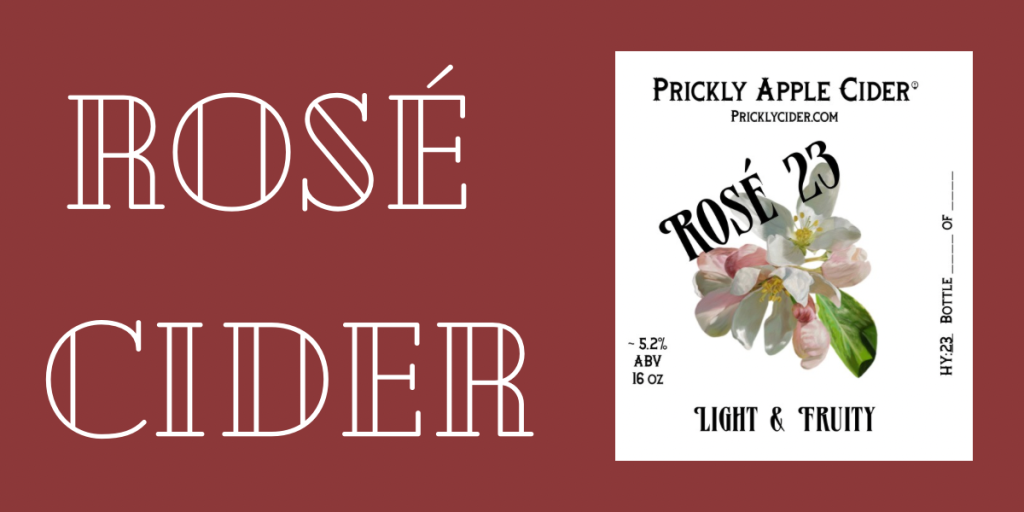
Let’s make “My First Hard Cider”.

The intent of this hard cider is to have a slightly hazy pour with moderate effervescence. The taste will be dry and most likely acidic. It probably won’t have much astringency and the mouthfeel will mostly come from the carbonation. Note that I recommend organic unfiltered apples juice. Organic apple juice in the US won’t have sulfites or other preservatives that could prevent fermentation. Check your ingredients label, and don’t buy anything that isn’t just apple juice. It might have malic or citric acid added, and that is okay. Pasteurized juice is also okay, but nothing else. You will see in the considerations section at the end some ideas for how you could make this hard cider slightly sweeter or add tannins. That is how you can evolve this method.
You will find that I break this method down into the major steps of Fermentation, Racking, Filtering, and Packaging. I use these four steps because they tend to be separated by time and require you to sanitize equipment. If they can be combined, I note that or leave out the step if not required.
My First Cider is intended to be a quick cider to make so the racking and packaging steps are combined as you will age it in the bottle. Also, I am suggesting you acquire the basic bottling equipment. I originally bought some flip-top bottles, thinking to avoid the capper and cap expense. If you are planning to make more than this batch, I’d suggest investing in the capper and caps. The cost will be slightly more but worth it in my opinion. Here is what you will need for this cider.
Fermentation Materials:
- One-Gallon Glass Carboy of Organic Unfiltered Apple Juice at Room Temperature
- Drilled #6 Rubber Stopper
- Three-Piece Airlock
- Package of SafAle S-04 Yeast
- Sanitizer
Racking & Packaging Materials:
- Mini Auto-Siphon
- 6 Quart or Larger Bowl, Bucket, or Container
- Tablespoon
- Organic White Sugar (Not Brown)
- Measuring Cup
- 4 oz Filtered or Bottled Water
- 10-12 Standard 12 oz Beer Bottles
- Bottle Brush
- 15 Bottle Caps
- Manual Bottle Capper
- Sanitizer
Fermentation Process:
- Sanitize your rubber stopper and airlock.
- Open the gallon carboy and set the original cap off to the side, ensuring you don’t contaminate the inside of the cap.
- Pour off enough juice into a glass to lower the level to where the carboy just starts to reduce and form the neck. You are doing this because you need head space, as the fermentation will produce foam.
- For this batch, I’m assuming you don’t have a hydrometer or refractometer, pH meter, or titration kit. If you do, use the juice you poured off to measure the sugar, pH and acid. If not, we will assume this juice is like most and has a specific gravity around 1.050-1.055. We are also assuming the juice is acidic since it’s dessert apples with a pH around 3.4-3.7.
- Smell the juice, then taste the juice and note any unique flavors. Your juice is most likely from dessert apples like Gala, Red Delicious, Granny Smith, or similar. Do you think this juice is more sweet or more acidic? It most likely won’t be bitter or astringent. If you think the sweet comes through more, you would call this sweet-forward. If you think the acid is more prevalent, it would be acid-forward. If the taste you just had is what you are expecting your cider to taste like, it won’t. All or at least most of that sugar is going to be converted to alcohol, leaving you with a slightly carbonated tart alcoholic beverage. The yeast is going to impart some flavors but it will also eliminate some aromas that you currently taste.
- Cut open your yeast packet and pour it into the carboy, being careful not to contaminate the inside neck of the carboy with your hands or the yeast packet. Do you need to use the entire packet? No. Most packets contain around 10 grams of yeast and support 5 gallons of must, but I’m trying to make this simple and adding the entire packet won’t hurt your hard cider.
- Take the original cap for the carboy and screw it back on the carboy. Keep your thumb on the cap, and making sure you don’t hit anything, give the carboy a few vigorous shakes. This will aerate the juice and mix the yeast.
- Remove the cap and insert the #6 stopper with airlock. Is there a way to remove a stopper that has been pushed all the way through the opening and fallen into the carboy? Yes, but not with juice in it and it’s still not easy. If you do this, hopefully, you have a second stopper and can ferment the juice and deal with the stopper when racking. Better yet, take care and don’t push the stopper too far. I suggest inserting the airlock into the stopper before you put it into the carboy. Push the stopper about 3/4 of the way down. Some carboys have slightly smaller or larger openings and some stoppers are harder or softer. Also, sometimes the stopper wants to slide up. If that happens, you can put a piece of masking tape on the top to hold it down but you shouldn’t need to do that. A #6 stopper should fit snuggly and hold into a one-gallon or half-gallon carboy.
- Take some masking tape and label your hard cider. Include the batch number, yeast, specific gravity and pH if you measured it, and the date.
- Move your carboy with airlock to a cool dark location (i.e. closet, basement, or cabinet) that is away from direct sun and out of the way. Ideally, you want a spot that will be 60-74 degrees Fahrenheit constantly. If it is too cold the yeast might not ferment. If it is too hot, the yeast may become stressed.
- Fill your airlock with inexpensive vodka to the fill line. You can use water or sanitizer solution, but some of this often gets pulled into the hard cider.
- Sit back and let the magic of yeast and sugar take its course. You should see some foaming in 24-36 hours, and your airlock should start bubbling after at least 48 hours. This bubbling should last for 1-3 weeks. As the bubbling subsides, you should see the hard cider clearing.
- If it’s not bubbling after 36-48 hours, look at your juice and listen closely next to your carboy. You should see and hear little bubbles rising to the surface. If this is happening but no out of your airlock, maybe your stopper isn’t sealing or your airlock is stuck. Try resealing these or adding a little more vodka. If you don’t see and hear anything, did you buy organic juice without preservatives? If you didn’t, these might be preventing your fermentation. Scrap this batch and start again. Did you use the entire packet of yeast? If not, put the rest of the yeast into the carboy. Is the location your carboy sitting getting too cold? Move it someplace warmer and stable. Was your juice refrigerated and cold when you started instead of room temperature? You may have shocked and killed off too much of yeast. You can give it another 24 hours to see if it recovers, or go ahead and add another packet of yeast. I’ve only had this issue once when I added a large amount of citrus to my must and made it too acidic. The yeast I initially tried didn’t like the acid, so I used Lalvin EC-1118, which will ferment about anything.
- After 3 weeks, it’s time to rack and package this cider.

Racking and Packaging Process:
- Sanitize your racking and packaging materials.
- Mini Auto-Siphon
- 6 Quart or Larger Bowl, Bucket, or Container
- Tablespoon
- Measuring Cup
- 10-12 Standard 12 oz Beer Bottles (Use your bottle brush to clean)
- 15 Bottle Caps
- In a microwave, heat 4 fluid ounces of filtered or bottled water in your sanitized measuring cup for 30-60 seconds.
- Measure one tablespoon of organic granulated white sugar and place in heated water. Stir to dissolve. Note: The sugar you add can impart flavors. For example, brown sugar would impart earthy notes from the molasses.
- Place the water sugar mixture in your 6 quart or larger sanitized container.
- Place the 6 quart sanitized container with water mixture at a lower level than your glass carboy with hard cider. I usually set mine in my sink and my carboy on the counter.
- Remove the stopper and airlock from your carboy and hard cider and set to the side for cleaning.
- Insert the auto-siphon into the hard cider, taking care not to stir up the lees and sediment at the bottom.
- Place the output tube of the auto-siphon into the sanitized container. Pump the auto-siphon to start the flow of hard cider into the container. The different heights of the two containers allows gravity to move the hard cider once it starts flowing.
- Monitor the flow and try to avoid suctioning in the lees. I usually start with the end of my auto-siphon about midway into my carboy and slowly drop it toward the bottom. You will not get all the liquid, because if you do you will get a lot of lees and sediment. Note that since you put the sugar and water into your container first, the flow of hard cider into the container will naturally mix and incorporate the sugar water.
- Lift the auto-siphon out of the hard cider to stop the flow or use the clamp on the output tube. Remove the auto-siphon and set the carboy to the side for cleaning.
- Drain the auto-siphon of any residual hard cider and rinse any lees and sediment from the bottom of it.
- Place your sanitized container with the cider and priming sugar mixture on the counter and begin setting bottles into the sink. If you have a clear bottle, use it for your first one as a reference bottle. Don’t try to put all of the bottles into the sink at once. Most sinks are sloped. You need to move the siphon tube from bottle to bottle without knocking over other bottles.
- Place the auto-siphon into the hard cider mixture and the output tube into a bottle. You really want to have a tube clamp on your auto-siphon so you can stop the flow. Place it on the tube where the clamp is just above the bottle opening and the bottom of the tube touches the bottom of the bottle.
- Pump the auto-siphon to start the flow of cider into the bottle. As the cider starts to almost reach the top (1/2 inch from the top) clamp the tube to stop the flow. Move the tube to a new bottle and open the clamp. Take the filled bottle and hand it to someone for capping or set it on the counter. Repeat until all the bottles are filled. You should have about 1.5-2 inches of head space in each bottle. If you don’t have enough hard cider to fill the last bottle, pour the remainder into a cup and place it in the refrigerator to chill while you finish. The hard cider in the cup will probably be a little harsh but also a little sweet because of the priming sugar. It will give you a reference for how your cider will change once it’s carbonated and aged a few weeks.
- Using the sanitized caps, cap each bottle. Write the date you racked and bottled this cider on your masking tape label and put this on your reference bottle (a clear one if you have it).
- Place the capped bottles in a dark cool location for at least two weeks to bottle condition it. If you have a clear reference bottle, you can monitor the cider color and carbonation activity. You will see some lees forming in the bottom of the bottle.
- After 2-3 weeks, you can refrigerate and serve, or continue to age it for 1-2 months. Remember to store the bottle standing up so the lees from bottle conditioning fall to the bottom. Also, avoid tipping the bottle multiple times during the pour to avoid mixing the lees.
- Congratulations, you’re now a member of the home hard cider making club!
Considerations:
This method was focused on low investment but you could expand this method. Some of these will be easier if you have more equipment, but I was trying to give you a good foundation without a lot of investment. Some modifications to consider are the following,
- If you want a sweeter cider, replace or mix about 8 ounces of pear juice with the apple juice. You could also back sweeten with organic Stevia or Erythritol, which is not fermentable. Remember, a little goes a long way.
- You can also use this to make adjunct ciders by including ingredients like honey in the primary ferment or other fruit juices.
- Try pressing your own apples. Apples, yeast, and adjunct are what will drive your flavor profile.
- Try racking your hard cider into a sanitized carboy, top it off with cider, juice, or water and let it age and clarify.
- Lastly, you could do a secondary fermentation with added fruits or juice. Remember that after the primary fermentation is complete, you want to minimize exposing your cider to oxygen.

Did you enjoy this article? Follow me for more hard cider related articles, tips, and recipes.