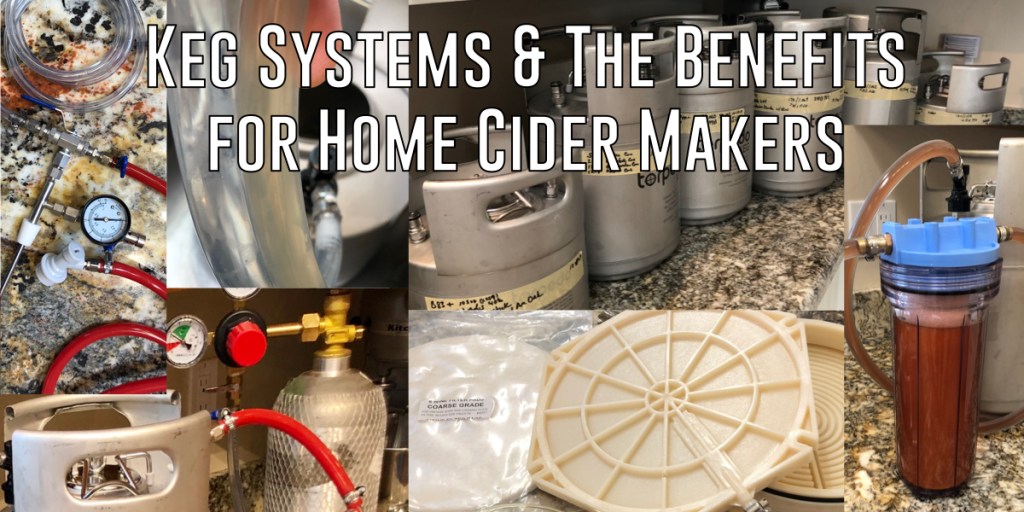
I broke down the equipment used to make hard cider into the following three basic process steps.
- Fermentation Equipment
- Aging Equipment
- Bottling Equipment
The final step and equipment list is for bottling. I have placed the PDF files for all steps on The Shop page. I have created these from the perspective of the home cider maker. Some of the advanced equipment could be used in a small commercial operations but even these are usually miniature versions of what you would find in a commercial cidery. The basic kit again focuses on what I feel is essential to be able to bottle your cider and the upgrades are where you will tend to migrate as you make more hard cider or at least make it year after year. You don’t need a lot of equipment if you are just planning to do a gallon or two (20-40 Liters) for the holidays or summer barbecues. If you start processing hundred or even thousands of pounds or apples and making gallons at a time, you will find yourself wanting some of the upgrades.
I broke down the process into the above steps because they are relatively independent and have a lot of unique equipment associated with them. The PDF file is available for download and has active links for easy reference. These links should take you to either your country’s Amazon site for purchase or to a manufacturer’s site. This will give you some details about the product and a reference for price. As with all the Amazon links on PricklyCider.com, using them to purchase these products from Amazon will result in me getting a small referral commission. What is nice is that it won’t cost you anymore money, but helps me cover the costs of maintaining the site. You will also find the PDF files on The Shop page along with other recommended products and even Cider Yeast that I am offering.
Bottling is the final step in preparing your cider for consumption. Sure, you may decide to bottle age it longer but once it is bottled, you generally don’t touch it again until it passes your lips. While bottling is sometimes called packaging because the process can be containers besides bottles, those packages are usually for larger producers. Some home cider makers might use bags or kegs, but it’s not as common as bottles. Therefore, my basic and even upgrades are focused on bottles. Let’s explore the basic kit and then some of the more advanced equipment you could use depending on how you want to bottle your cider.

The Basic Kit
Bottling usually occurs after a cider has aged and clarified. The common method for most home cider makers is to add some sugar to the cider right before bottling it. This will results in some fermentation restarting, which creates carbonation or CO2. This process is called priming or conditioning. Once the cider is bottled, it can take 2-8 weeks at room temperature (20C/68F) for the carbonation to occur. Even if you don’t like carbonation, adding a little sugar can be good because it will remove the oxygen added during the racking and bottling process. Some don’t add sugar and eliminate the headspace by almost topping off the bottle. Either way, you need a bottle, some type of enclosure, and a siphon. Assuming you are recycling bottles, you also need a brush and a cleaning and/or sanitizing agent. I also recommend some type of rack for drying bottles. As for bottles, I prefer crown caps over flip caps if you are going to carbonate. I found the flip tops didn’t hold carbonation over extended periods of time (+12 months). I also found they couldn’t withstand high pressure (+3.5 volumes CO2). However, flip tops are very convenient if you don’t want to buy caps and a capper and they do a good job if you are carbonating to normal levels (2.0-3.25 volumes CO2) and plan to drink them in less than a year.
Upgrades & Enhancements
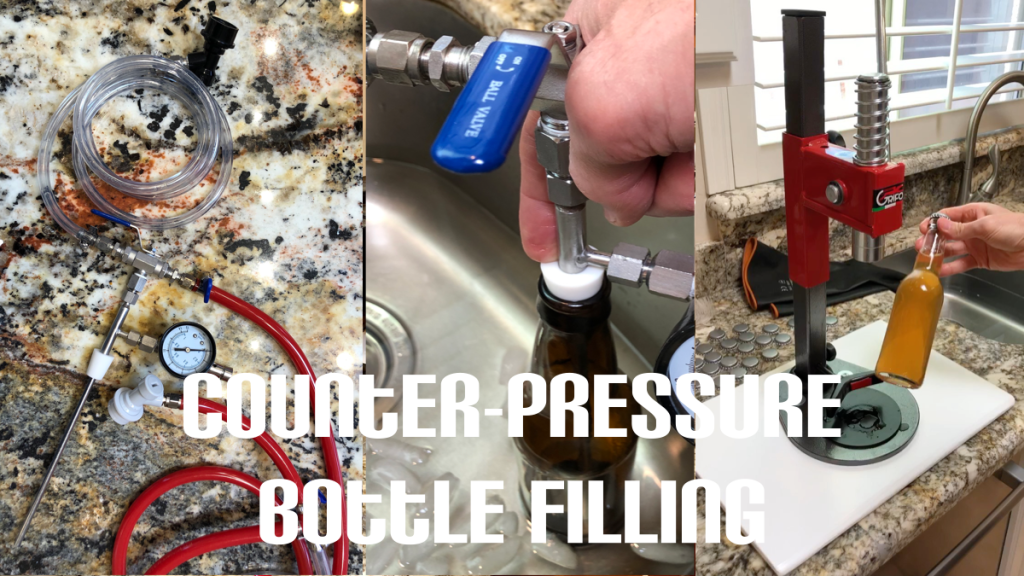
If you don’t like the sediment created by bottle conditioning but want carbonation, you have another reason the buy kegs. A kegging system can help reduce oxygen exposure during aging, but also allows you to force carbonate and counter-pressure bottle your cider. This means you can produce a carbonated product with no sediment because you can simply force CO2 into the cider by pressurizing the keg and allowing it to dissolve into the cider. You could serve from the keg, but if you want to give some to friends and family, you ultimately need to bottle it. That means getting a counter-pressure bottle filler to use with your kegging system. You will need plenty of tubing and fittings as well. The last key upgrade I recommend is a heavy duty bench bottle capper. My Grifo capper ranks up there with my Tilt Hydrometers. I was even tempted to make is part of the basic kit, but the cost pushes it into the upgrade list.
Hopefully, this along with the other two lists will help you create your own custom kit. As always, if you use the supplied links to make purchases at Amazon, it will help support PricklyCider.com without increasing your cost. Thank you in advance for your support.
Did you enjoy this article? Don’t miss future posts from PricklyCider.com by following us today! PricklyCider.com is your source for all things cider.